To make a printable texture from an image, remove lighting and background artifacts, convert visible form into clean grayscale height information, establish repeat behaviour and test the physical feature size.
Choose Create Texture from the top bar. Reskin3D offers an image workflow for already-clean artwork and Trace Studio for photographed physical surfaces.
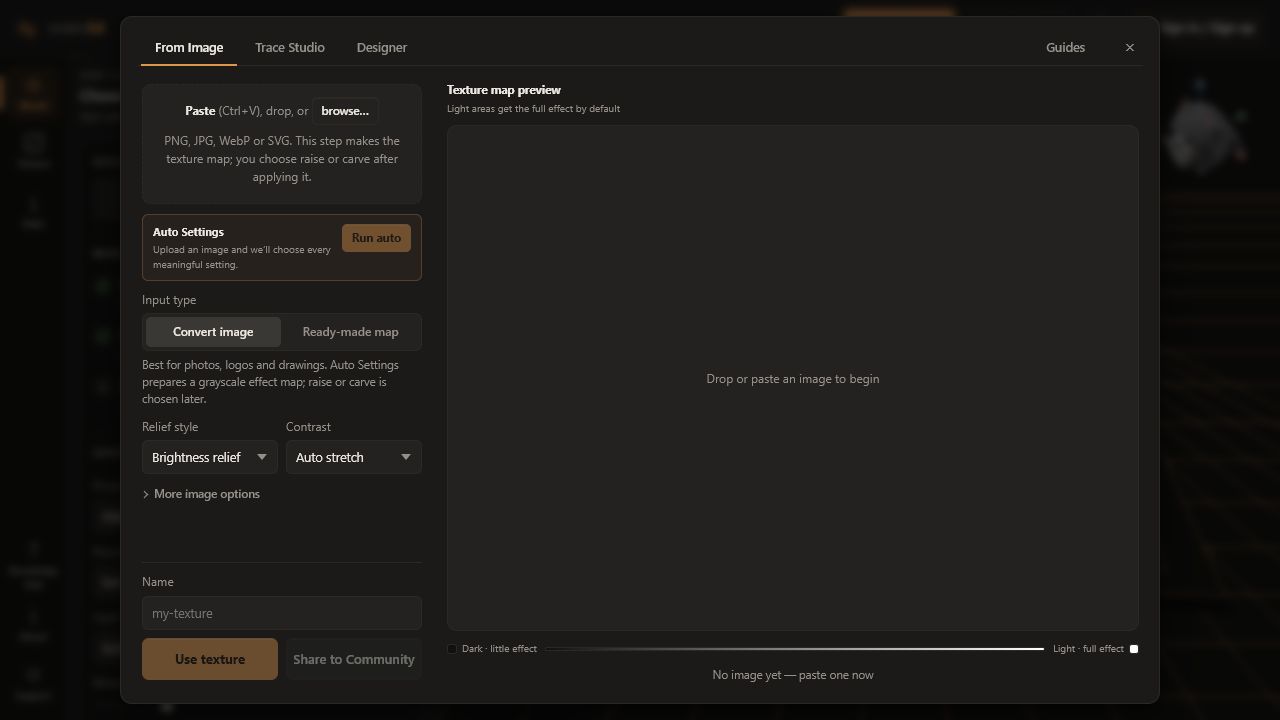
Choose Image Texture or Trace Studio
| When you have… | Choose… | Why |
|---|---|---|
| A logo, drawing, screenshot, scan, or clean top-down image | Image Texture | Automatic grayscale, contrast, and edge cleanup |
| A phone photo of leather, stone, fabric, bark, or another material | Trace Studio | Perspective correction and uneven-light removal |
| Text and geometric shapes you want to author | Texture Designer | Build the source directly from editable elements |
Capture a useful source
For a physical material, place the camera as square to the surface as possible. Use diffuse light from multiple directions or overcast daylight. Avoid a single hard lamp, glare, motion blur, and extreme perspective.
- Fill the frame with the material while leaving enough area to crop.
- Include a ruler if you plan to declare real-world scale later.
- Capture a region larger than one obvious repeat.
- Keep the phone’s sharpening and portrait effects off where possible.
Choose how From Image interprets the source
Use Convert image for photographs, logos, drawings, and ordinary artwork. Auto Settings converts and cleans it. Use Ready-made map only when the file is already a deliberate grayscale height map; this avoids unnecessary reinterpretation.
| When you have… | Choose… | Why |
|---|---|---|
| Overall light and dark should become relief | Brightness relief | Uses luminance as the effect map |
| Only boundaries should become strokes | Raised outlines | Extracts edges rather than filled regions |
| A directional shaded look is wanted | Directional emboss | Creates light/dark relief from a chosen directional response |
Auto stretch expands the useful tonal range. Balance local contrast brings out detail in uneven areas. Keep original preserves existing values and is safest for a prepared map.
Use More image options only to solve a visible problem
| Control | Use it when… | Trade-off |
|---|---|---|
| Smooth / denoise | Noise or pixel texture creates unwanted bumps | Too much removes real small detail |
| Simplify outline | Edges are jagged or contain tiny artifacts | Rounds corners and changes the exact outline |
| Posterize levels | You want a small number of stepped heights | Replaces smooth slopes with terraces |
| Threshold | You want a two-level mask or silhouette | Removes intermediate height information |
| Remove flat background | A uniform border/background should have no effect | Similar-valued connected details may also be removed |
| Swap light and dark | The saved map itself is opposite to your intent | Usually polarity can be changed later instead |
| Blend edges for tiling | The source will repeat and opposite edges do not join | Can soften or blend features near the borders |
Crop and straighten in Trace Studio
Move the four corner handles so they outline a rectangular region on the material. The Crop & straighten preview shows the corrected source. Choose an area with consistent focus and representative detail.
Clean and profile a traced material
Start with Auto Settings. Balance uneven lighting removes broad light-to-dark drift; Adaptive window chooses the neighbourhood used for local thresholding; Threshold sensitivity changes how strongly a local feature must differ; Remove artifacts deletes isolated regions below the chosen pixel area; Simplify edges rounds noisy outlines.
Profiles control the detected feature cross-section. Flat plateau creates a level top, Chamfer 45° creates a straight slope, Rounded dome creates curved relief, and V-groove / raised stroke creates a pointed ridge-like section. Profile width controls how far that slope or rounding extends.
Check inversion, edges, and scale
Invert trace swaps which regions the Trace Studio result emphasises. For a repeating material, compare opposite edges. If a strong feature is cut at one edge but does not continue at the other, use Blend edges for tiling and inspect the repeated result.
Name the texture clearly and choose Use texture. It is saved to My Textures. After applying it, set a physical Texture size or enable True to scale when the texture record has measured dimensions.
For deeper interpretation of seams, lighting, and quality metrics, read Height maps, image quality, and seamless repeats.
Share only the processed texture
Share to Community starts a review flow for the processed height map, automatic cover, description, tags, licence, physical size, and recommended depth. Your original photo and model stay on this device. A private draft is only visible to your account until you submit it.