Set texture size in millimetres, choose emboss or deboss from clearance and wall constraints, and keep features wide and deep enough to create actual slicer toolpaths.
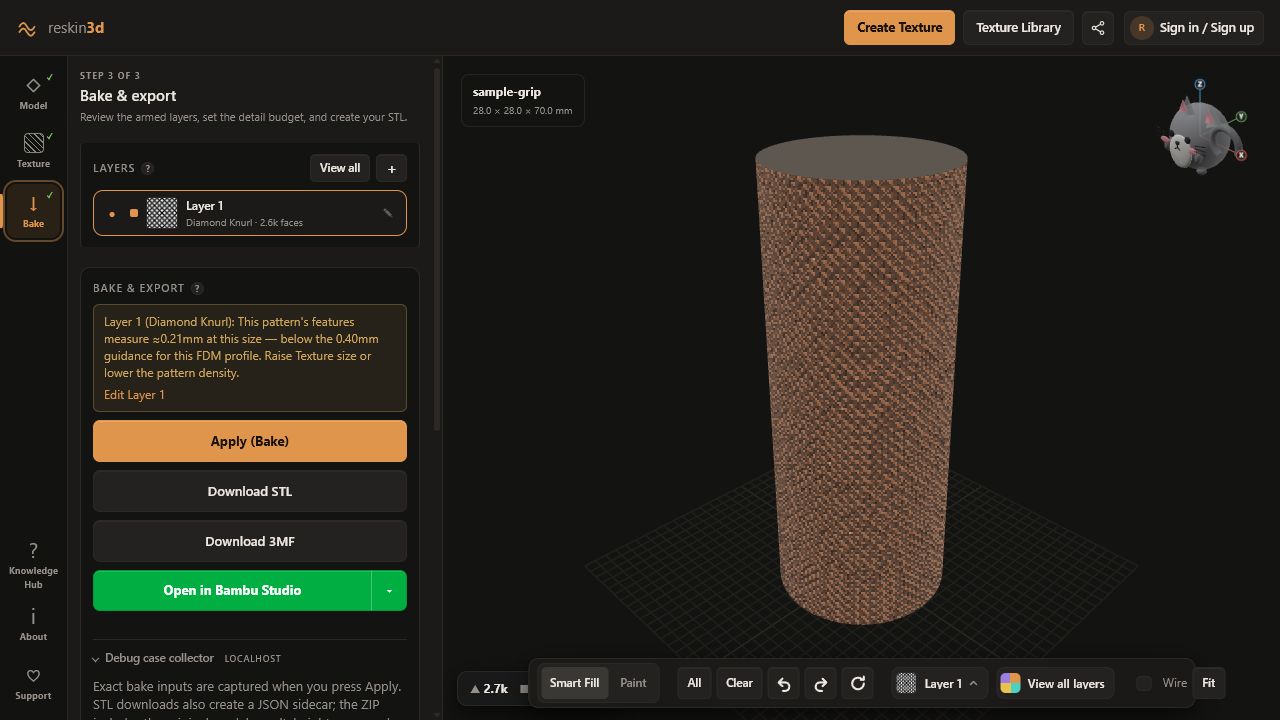
Preview quality and print quality are different. The GPU can display changes smaller than a nozzle path or resin pixel. Reskin3D’s print settings and warnings help you choose physical values, but the sliced toolpath is the final test.
Set the real feature size
Texture size is measured in millimetres on the model. Increasing it makes every motif larger; decreasing it packs more repeats into the same surface. Use True to scale only when the texture has declared measured dimensions.
Place once makes Texture size control the complete logo or motif rather than a repeating tile. Position it with the pad and verify that the entire motif stays inside the selected region.
Choose emboss, deboss, or both
| When you have… | Choose… | Why |
|---|---|---|
| Outside dimensions and clearance can grow | Emboss (raise) | Adds tactile material above the original skin |
| Outside envelope must stay close to the original | Deboss (carve) | Cuts detail inward but consumes wall thickness |
| A balanced sculpted surface is desired | Both | Moves around the original midline and needs clearance both ways |
Direction describes where geometry moves. It does not decide whether light or dark pixels get the full movement.
Set polarity deliberately
Light areas or Dark areas selects which end of the grayscale map receives the full effect. The result sentence below the control says exactly what will happen, such as “Light areas carve deepest.”
If a grout line should carve but the height map shows it dark, select Dark areas. Keep the desired direction. This avoids the common mistake of switching from carve to raise to correct a reversed image.
Choose depth from the process
For a typical 0.4 mm nozzle and 0.20 mm FDM layers, 0.4–0.8 mm is a useful starting range for clearly visible grip or decorative detail. Shallower effects can work on vertical walls but may disappear on shallow slopes; deeper cuts need more wall.
For SLA/resin, pixel size and nominal layer height are only part of the limit: exposure bleed, antialiasing, orientation, supports, drainage, and cleaning can soften detail. For SLS/powder, particle size, thermal process, orientation, and service-specific design rules matter. Reskin3D’s process choice can guide warnings, but it does not replace the printer or bureau’s validated minimum-feature rules.
| When you have… | Choose… | Why |
|---|---|---|
| Subtle visual grain | 0.15–0.35 mm | Slice carefully; may be fewer than two FDM layers |
| General FDM texture | 0.4–0.8 mm | Usually visible and tactile with a 0.4 mm nozzle |
| Deep grip or bold relief | 0.8–1.5 mm | Needs coarse features, strong walls, and clearance |
| Resin or SLS detail | Test coupon + process rules | Machine, material, orientation, and finishing dominate |
Understand mesh quality
Quality (mesh detail) sets a baseline for how finely the texture is meshed. Reskin3D can raise effective detail when it detects a pattern finer than the source mesh. Higher values can sharpen edges but also increase bake time and file size.
Triangle budget caps how many triangles a bake may add. Flat or slowly changing areas use less; high-frequency height changes use more. Increase it only when the baked geometry visibly loses important detail, not simply because a higher number exists.
Read warnings as decisions
Warnings compare the requested result with nozzle width, layer height, wall guidance, detected feature size, and bake limits. Fix the cause that matters:
- Increase Texture size when features are too fine.
- Increase depth when the effect is shallower than useful layers.
- Reduce carve depth or protect the face when wall thickness is at risk.
- Increase mesh quality or triangle budget only when geometry resolution is the limit.
Validate in the slicer and with a coupon
Use layer preview to verify that toolpaths reproduce grooves and ridges. Inspect perimeter count through carved sections, seam placement, support creation, and the first layers touching the texture. A 20–40 mm cropped test is more reliable than guessing from a full-size print.