Build a printable texture from deliberate shapes, text and strokes, check its 2×2 repeat, then apply it to a real model where scale, mapping and depth can be validated.
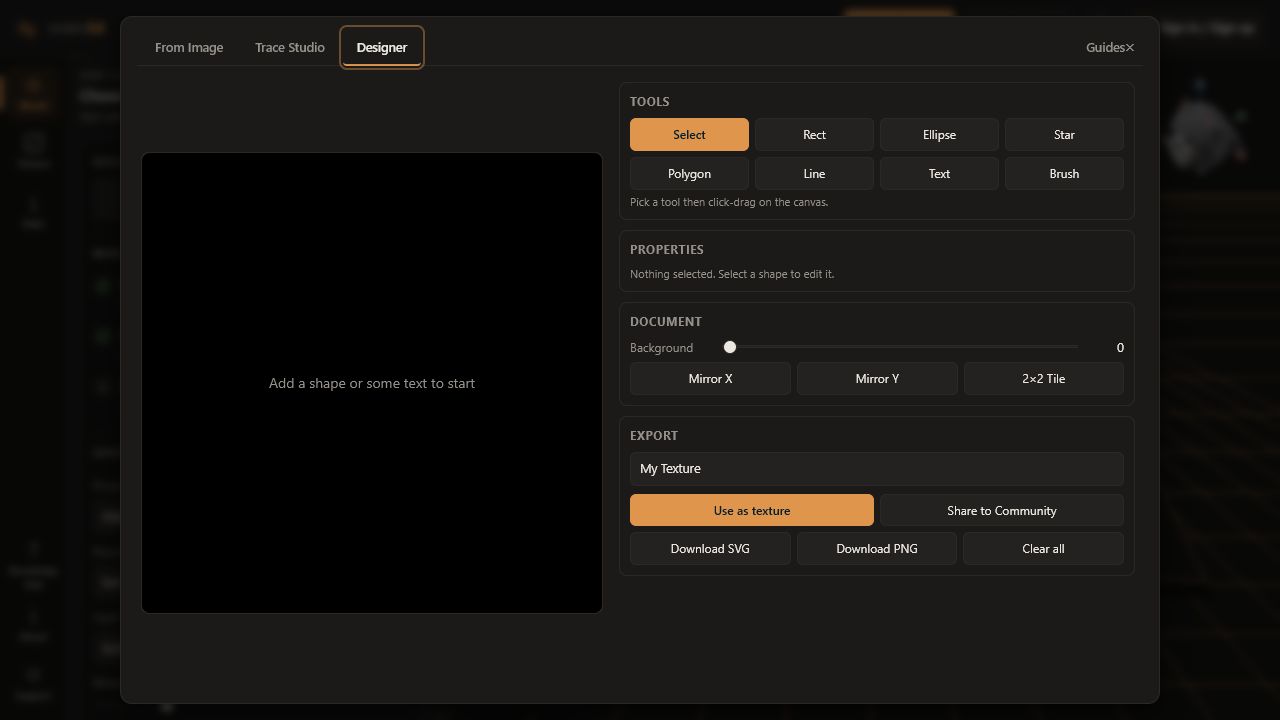
Texture Designer is for clean, authored patterns: labels, symbols, line work, geometric arrangements, and freehand marks. It creates a 2D height map; applying, mapping, raising or carving still happens afterward in the Texture stage.
Open the Designer with an intention
Choose Create Texture, then open Texture Designer. Decide whether the result will repeat like wallpaper or be placed once like a sticker. This affects where you place elements and whether they can touch the canvas edges.
| When you have… | Choose… | Why |
|---|---|---|
| Logo, label, serial mark, emblem | Place once | Keep the whole design inside the canvas with a quiet border |
| Geometric or decorative surface pattern | Repeat | Elements crossing one edge must continue at the opposite edge |
| Tactile indicator or grip zone | Either | Choose based on whether one located patch or continuous coverage is needed |
Think in height-map values
Every shape, letter, and stroke contributes a grayscale value. Strong light–dark separation creates a clear plateau or groove; soft intermediate values create slopes. Do not use colour to communicate meaning because the manufacturing result is grayscale displacement.
You will choose the full-effect polarity later. Focus here on which parts belong together and whether transitions should be hard or gradual.
Build with shapes, lines, and text
Choose Rect, Ellipse, Star, Polygon, Line, or Text, then click-drag on the 512-unit design canvas. Return to Select to move an element and expose its properties.
Shape-specific controls set width, height, corner radius, points, sides, inner radius, or line thickness. Text exposes content, font, size, and Bold. Use consistent spacing so narrow gaps do not collapse when printed; decorative fonts and tiny counters often disappear in an FDM slice.
Use Brush, symmetry, and stacking deliberately
Brush makes a freehand path with adjustable thickness. Smooth, confident strokes create cleaner relief than dense scribbles. Avoid nearly overlapping lines unless you want them to merge into a broad ridge.
Mirror X and Mirror Y repeat every element across the document axes without requiring manual duplicates. Use Up and Down when shapes overlap, and Duplicate for a real editable copy.
The Background slider controls the untouched canvas value. Keep enough contrast between background and elements to create useful relief.
Use the 2×2 Tile preview
Turn on 2×2 Tile to reveal seams, unequal spacing, clipped elements, and an obvious repeated centre. This is a preview only; it does not add four copies to the saved texture.
For a repeated design, any element crossing the left edge must continue on the right, and top must continue into bottom. Mirror controls create symmetry but do not automatically guarantee edge continuity. For a one-off motif, ensure the background is level and important content stays away from the selection boundary so Edge feather does not soften it unexpectedly.
Name, save, and apply
Give the texture a name that describes both motif and intent, such as “Raised safety chevrons” rather than “Design 4.” Finish the Designer to save it in My Textures, then apply it to the active layer.
Use Surface selection and layers to isolate its location, Scale, depth, and printability to choose physical values, and Mapping and projection if the design must follow a curved surface.
Export the source when needed
The Designer can export PNG or SVG artwork for reuse. Those source exports are not the same as a baked model: PNG/SVG describes the 2D texture, while Download STL/3MF after baking contains the displaced 3D geometry.